![]()

What Do You Need to Build a Gaming PC? The 2026 Complete Component Checklist
Building a gaming PC in 2026 isn’t rocket science, but walking into it blind can lead to expensive mistakes, like pairing a $600 GPU with a bargain-bin PSU that can’t handle the load, or buying RAM that’s incompatible with your motherboard. The good news? Once you understand what each component does and how they work together, the process becomes straightforward.
This guide breaks down every essential component you need, explains how to choose them based on your budget and gaming goals, and cuts through the marketing noise. Whether you’re aiming for 1080p esports dominance or 4K ultra settings, you’ll know exactly what to buy and why.
Key Takeaways
- The GPU deserves 35-45% of your gaming PC budget since it has the biggest impact on frame rates and gaming performance.
- A gaming PC requires nine essential components: CPU, GPU, motherboard, RAM, storage, PSU, case, cooling system, and Windows—compatibility between parts is critical to avoid expensive mistakes.
- For gaming in 2026, choose 16GB RAM as the minimum (with 32GB as the sweet spot for enthusiasts) and pair it with a quality NVMe SSD for fast load times and a reliable 80+ Gold power supply.
- Match your GPU to your monitor’s resolution: RTX 5060 for 1080p, RTX 5070 for 1440p, and RTX 5080 or 5090 for 4K gaming to avoid overspending on unnecessary performance.
- Mid-range gaming builds ($1000-$1500) offer the best value, delivering 1440p high-ultra settings with 4-5 years of relevance, while entry-level builds work for 1080p and competitive esports gaming on a $600-$900 budget.
Understanding the Essential Components of a Gaming PC
A gaming PC consists of several core components that work together to deliver performance. Unlike consoles, PCs are modular, each part has a specific job, and you can upgrade individual pieces over time.
The CPU (processor) handles game logic, AI, physics calculations, and background tasks. The GPU (graphics card) renders every frame you see on screen and has the biggest impact on gaming performance. The motherboard connects everything and determines compatibility between parts. RAM (memory) stores active game data for quick access. Storage drives hold your games and OS, with SSDs dramatically reducing load times. The PSU (power supply) delivers clean, stable power to all components. The case houses everything and manages airflow. Cooling systems prevent thermal throttling during intense sessions.
Each component has dependencies. Your CPU and RAM must match your motherboard’s socket and memory type. Your GPU needs enough PSU wattage and physical case clearance. Your cooler must fit your CPU socket and case dimensions. Understanding these relationships prevents compatibility headaches and wasted money.
The Processor (CPU): Your Gaming PC’s Brain
The CPU executes game instructions, manages system resources, and handles tasks like streaming, voice chat, and background apps. While the GPU does most heavy lifting in gaming, a weak CPU creates bottlenecks, especially in simulation games, strategy titles, and competitive shooters that rely on high refresh rates.
In 2026, expect to spend $150-$550 on a gaming CPU depending on your performance tier. Mid-range options like the AMD Ryzen 5 8600 or Intel Core i5-14400F deliver excellent 1080p and 1440p performance for $180-$220. High-end builds benefit from the Ryzen 7 8700X or Core i7-14700K ($320-$400), which handle 4K gaming, content creation, and future-proofing.
Choosing Between Intel and AMD for Gaming
Both manufacturers trade blows with each release cycle. As of March 2026, AMD’s Ryzen 8000 series (Zen 5 architecture) offers strong multi-threaded performance and competitive pricing, while Intel’s 14th Gen Core processors deliver slightly higher single-thread speeds in some titles, beneficial for esports games like CS2 and Valorant.
AMD CPUs generally include stock coolers adequate for non-overclocking use. Intel’s K-series chips (unlocked for overclocking) don’t include coolers and run hotter under load. Platform cost matters too: AMD’s AM5 socket supports DDR5 only, while Intel’s LGA1700 offers both DDR4 and DDR5 motherboard options, potentially saving money on entry-level builds.
Check recent hardware benchmarks for your specific target games, as performance varies by title and resolution.
How Many Cores Do You Really Need?
For pure gaming in 2026, 6 cores is the practical minimum. Most modern titles use 4-6 cores effectively, with diminishing returns beyond 8 cores unless you’re streaming or running heavy multitasking.
6-core CPUs (Ryzen 5, Core i5) handle all current games at high FPS. 8-core CPUs (Ryzen 7, Core i7) provide headroom for streaming, recording, or productivity work. 12+ cores (Ryzen 9, Core i9) target content creators and enthusiasts who run demanding workloads alongside gaming.
Don’t overspend on cores you won’t use. That $200 difference between a Ryzen 7 and Ryzen 9 often delivers better gaming performance if redirected to a stronger GPU.
The Graphics Card (GPU): The Most Critical Gaming Component
If you’re building a PC primarily for gaming, the GPU deserves the largest chunk of your budget, typically 35-45% of total build cost. This component renders every frame, applies visual effects, handles ray tracing, and determines what resolution and settings you can realistically run.
GPU prices span from $180 for entry-level cards to $1600+ for flagship models. Performance scaling isn’t linear: a $400 GPU doesn’t deliver twice the FPS of a $200 card, but the difference between budget and mid-range is massive.
NVIDIA vs AMD: Which GPU Brand Fits Your Budget?
NVIDIA’s RTX 50-series (launched late 2025) dominates the high-end market with superior ray tracing performance and DLSS 4 upscaling technology. The RTX 5060 ($280-$320) targets 1080p gaming, the RTX 5070 ($480-$550) handles 1440p beautifully, and the RTX 5080 ($900-$1000) pushes 4K with ray tracing enabled.
AMD’s RX 8000 series offers competitive rasterization performance at lower price points. The RX 8600 XT ($250-$280) trades blows with the RTX 5060 in non-ray-traced games. The RX 8800 XT ($520-$580) challenges the RTX 5070 Ti while costing less. AMD’s FSR 3.1 upscaling has improved but still trails DLSS in image quality.
Consider your priorities: NVIDIA wins for ray tracing, content creation (CUDA acceleration), and AI features. AMD often provides better value for pure rasterization performance and includes more VRAM at comparable price points, useful for modded games and future titles.
Matching Your GPU to Your Monitor Resolution
Your GPU choice should align with your monitor’s resolution and refresh rate. Mismatches waste money or create frustrating performance.
1080p gaming (1920×1080): RTX 5060, RX 8600 XT, or RTX 4060 handle high-ultra settings at 60+ FPS. For competitive 144Hz+ gaming, consider an RTX 5060 Ti or RX 8700 XT.
1440p gaming (2560×1440): The sweet spot for most gamers. Target the RTX 5070, RX 8800 XT, or RTX 4070 Super for high-ultra settings at 60-100 FPS. Competitive players chasing 165Hz should look at RTX 5070 Ti or higher.
4K gaming (3840×2160): Demands serious GPU power. The RTX 5080 delivers 60+ FPS at high settings: the RTX 5090 targets 4K 120Hz. Budget 4K gaming works with upscaling, an RTX 5070 can handle 4K with DLSS Quality mode in many titles.
Don’t buy a 4K-capable GPU if you’re gaming on a 1080p monitor. Redirect that budget to your display instead.
Motherboard: The Foundation That Connects Everything
The motherboard determines which CPU, RAM, and storage you can use, how many expansion slots you have, and what features are available. It’s not the most exciting component, but choosing wrong creates compatibility issues or limits future upgrades.
Expect to spend $100-$350 depending on features and chipset. Budget boards ($100-$150) work fine for non-overclocking builds with basic connectivity. Mid-range options ($150-$250) add better VRMs for stable power delivery, more M.2 slots, and improved I/O. Premium boards ($250+) target enthusiasts who want extensive RGB control, high-end audio, WiFi 7, and robust overclocking support.
Key factors when choosing a motherboard: socket compatibility (AM5 for AMD Ryzen 8000, LGA1700 for Intel 14th Gen), chipset (determines features and overclocking support), RAM slots and max capacity, M.2 slots for NVMe SSDs, rear I/O ports (USB, networking, audio), and VRM quality for stable CPU power delivery.
For AMD builds, the B850 chipset offers the best value for most gamers, supporting PCIe 5.0 and moderate overclocking. The X870 chipset adds more connectivity and better VRMs for high-end CPUs. For Intel, B760 boards handle non-K CPUs perfectly, while Z790 boards enable overclocking on K-series processors.
Form Factors and Compatibility Considerations
Motherboards come in three main sizes. ATX (305×244mm) is the standard full-size format with the most expansion slots and features, ideal for mid-tower cases. Micro-ATX (244×244mm) cuts some expansion slots but fits smaller cases and costs less, making it perfect for budget or compact builds. Mini-ITX (170×170mm) enables tiny SFF builds but limits you to one PCIe slot and two RAM slots, with premium pricing for quality models.
Ensure your case supports your chosen form factor. Most mid-tower cases accommodate all three, but compact cases may only fit Micro-ATX or Mini-ITX. Also verify your GPU length, some Micro-ATX cases have limited clearance for longer graphics cards.
Memory (RAM): How Much Do Gamers Actually Need?
RAM stores active game data, textures, and system processes for instant CPU access. Insufficient RAM causes stuttering and forces your system to swap data to slower storage. Too much RAM provides zero performance benefit and wastes money.
For gaming in 2026, 16GB is the minimum for comfortable 1080p gaming. Many modern titles like Cyberpunk 2077, Starfield, and upcoming AAA releases recommend 16GB. 32GB is the sweet spot for enthusiasts, it handles any current game, allows extensive multitasking, and provides future-proofing for $80-$120. 64GB only benefits content creators running RAM-intensive workloads alongside gaming.
Buy RAM in dual-channel kits (2×8GB or 2×16GB) rather than single sticks. Dual-channel configuration doubles memory bandwidth and can improve FPS by 10-20% in CPU-bound scenarios.
DDR4 vs DDR5: Speed and Capacity Requirements
DDR5 is the current standard for new builds. AMD’s AM5 platform requires DDR5, and it’s the recommended choice for Intel’s LGA1700 platform. DDR5 offers higher speeds (5600-7200MT/s common) and better performance scaling. Expect to pay $60-$70 for 2×8GB DDR5-5600 or $100-$130 for 2×16GB DDR5-6000.
DDR4 remains viable for budget Intel builds using older or budget motherboards. You can find 2×8GB DDR4-3200 for $35-$45 or 2×16GB for $55-$75. The performance gap between fast DDR4 (3600MT/s CL16) and entry DDR5 (5600MT/s) is minimal, typically 3-7% depending on CPU and game.
For DDR5, target DDR5-6000 CL30 for AMD systems (optimal for Ryzen 8000’s Infinity Fabric) and DDR5-5600 or 6400 for Intel builds. Going beyond diminishing returns on gaming performance: that $50 premium for DDR5-8000 won’t deliver noticeable FPS gains.
RAM speed matters more for CPU-bound scenarios and high refresh rate gaming. If you’re targeting 1440p 60Hz with a mid-range GPU, budget RAM works fine. Competitive players chasing 240+ FPS benefit from faster memory.
Storage Solutions: SSD vs HDD for Gaming
Storage holds your operating system, games, and files. The type and speed dramatically affect boot times, game load times, and in-game asset streaming.
SSDs (Solid State Drives) are mandatory for your primary drive in 2026. They deliver 10-100x faster load times than HDDs, cost little more, and eliminate the loading screen frustration. HDDs (Hard Disk Drives) still serve as cheap secondary storage for massive game libraries or media files.
A typical gaming build uses a 500GB-1TB NVMe SSD for Windows and active games ($40-$85), optionally paired with a 2-4TB HDD for archival storage ($50-$85). If you play many games simultaneously or work with large files, jump to a 2TB NVMe SSD ($120-$180).
Modern games are huge. Call of Duty titles exceed 200GB, Baldur’s Gate 3 sits at 150GB, and Microsoft Flight Simulator pushes 170GB. A 500GB drive fills quickly once you install Windows (25GB) and a few AAA titles.
NVMe SSDs and Load Time Performance
NVMe SSDs connect via M.2 slots and use the PCIe interface, delivering sequential speeds of 3000-14000 MB/s depending on PCIe generation. PCIe 3.0 drives ($40-$50 for 500GB) offer 3500 MB/s and handle all gaming needs perfectly. PCIe 4.0 drives ($55-$75 for 1TB) reach 7000 MB/s and benefit DirectStorage-enabled games. PCIe 5.0 drives ($130+ for 1TB) hit 10000+ MB/s but provide minimal real-world gaming advantage over PCIe 4.0.
For most gamers, a quality PCIe 4.0 NVMe SSD like the WD Black SN850X, Samsung 990 Pro, or Crucial T700 delivers excellent performance. Reviews from independent testing outlets show diminishing returns beyond PCIe 4.0 speeds for current games.
Ensure your motherboard has available M.2 slots. Budget boards typically include 2-3 slots: check if they support PCIe 4.0 or 5.0. Some slots share bandwidth with SATA ports, consult your motherboard manual to avoid disabling other connectors.
Power Supply Unit (PSU): Don’t Skimp on Quality
The PSU converts AC power from your wall outlet to stable DC power for your components. A quality PSU delivers clean power, protects your hardware during surges, and lasts through multiple build upgrades. A cheap PSU can damage components, cause system instability, or fail catastrophically.
PSUs are rated by efficiency: 80+ Bronze (85% efficient), 80+ Gold (90%), 80+ Platinum (92%), and 80+ Titanium (94%). For gaming builds, 80+ Gold offers the best value, reliable, efficient, and reasonably priced. Bronze units work for strict budgets but waste more energy as heat. Platinum and Titanium only make sense for high-wattage systems running 24/7.
Modularity affects cable management. Fully modular PSUs let you attach only needed cables, simplifying builds and improving airflow. Semi-modular units have fixed motherboard cables but removable peripheral cables. Non-modular PSUs come with all cables permanently attached, creating cable clutter but costing less.
Stick to reputable brands: Corsair, EVGA, Seasonic, be quiet., and Thermaltake make reliable units. Avoid no-name PSUs from Amazon, they often lie about specifications and lack proper safety certifications.
Calculating Wattage Requirements for Your Build
Underestimating wattage causes system crashes under load. Overestimating wastes money on capacity you’ll never use. Calculate based on your GPU and CPU, the two biggest power consumers, then add 20-30% headroom for efficiency and future upgrades.
Entry-level builds (RTX 5060 + Ryzen 5 8600): 450W minimum, 550W recommended. Mid-range builds (RTX 5070 + Ryzen 7 8700X): 650W minimum, 750W recommended. High-end builds (RTX 5080 + Core i7-14700K): 850W minimum, 1000W recommended. Enthusiast builds (RTX 5090 + flagship CPU): 1200W minimum.
GPU manufacturers specify recommended PSU wattage, follow it. The RTX 5080 recommends 850W: pairing it with a 650W PSU will cause shutdowns during gaming. Modern high-end GPUs have power spikes that exceed their average consumption.
Quality matters more than peak wattage. A reputable 650W Gold PSU outperforms a sketchy 750W Bronze unit. Check professional reviews that test voltage stability, ripple suppression, and build quality.
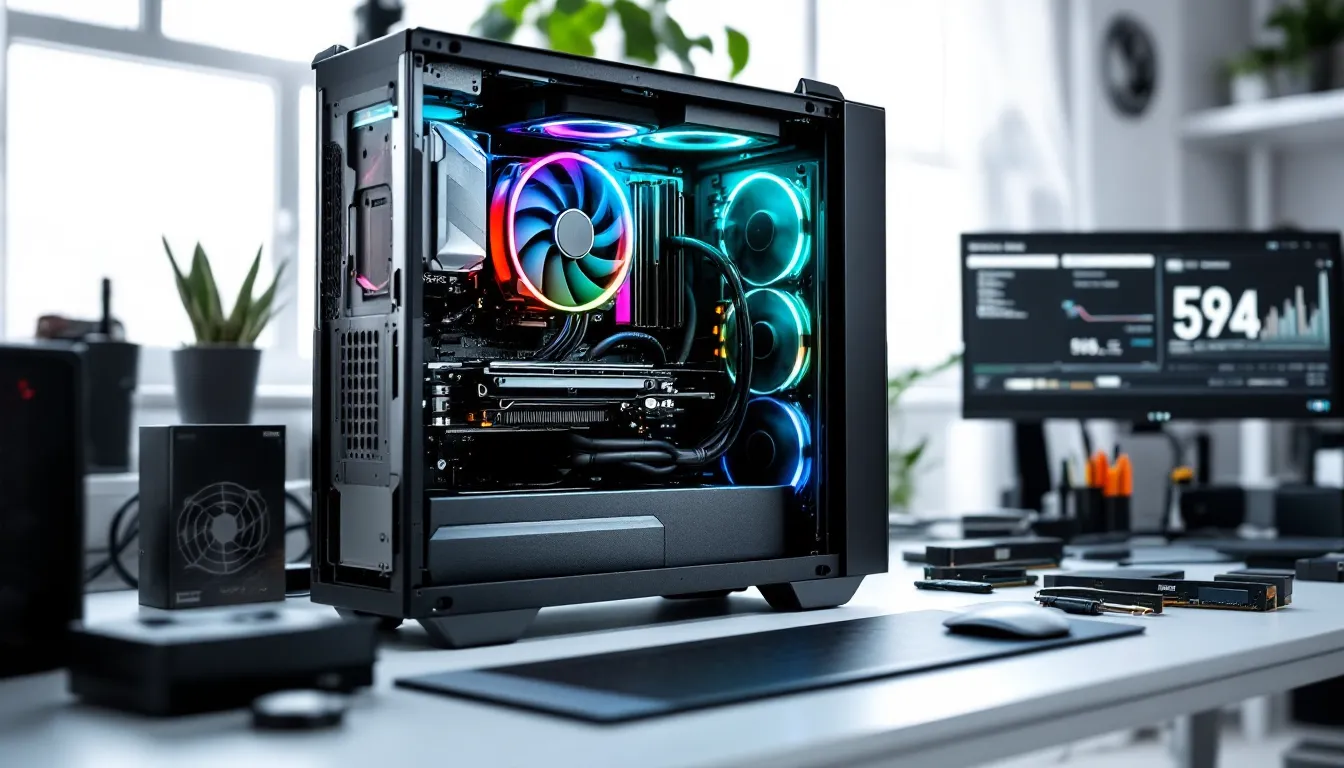
PC Case: Airflow, Aesthetics, and Size
The case houses your components, manages airflow, and defines your build’s appearance. It’s a visible purchase that’ll sit on or under your desk for years, so choose something you like looking at that also performs well thermally.
Cases range from $50 budget boxes to $300+ showcase pieces. Mid-range options ($70-$130) typically offer excellent airflow, cable management features, tempered glass panels, and dust filters. Unless you’re building SFF or need extreme aesthetics, spending beyond $150 provides diminishing returns.
Case size determines motherboard compatibility and component clearance. Full-tower cases accommodate EATX motherboards, multiple GPUs, and extensive watercooling but take up serious desk space. Mid-tower cases fit ATX/Micro-ATX boards, most GPUs, and tower coolers while remaining manageable, they’re the standard for most builds. Compact/SFF cases create tiny builds but require careful component selection and often compromise on cooling or expandability.
Check GPU clearance before buying. Modern high-end cards extend 310-340mm long and need adequate space. Verify CPU cooler height clearance too, large air coolers can exceed case limits.
Airflow impacts temperatures and noise. Cases with mesh front panels and included fans (at least two intake, one exhaust) provide better thermals than solid-front designs with restricted intake. Positive pressure (more intake than exhaust) reduces dust buildup.
Popular options include the Fractal Design Torrent (exceptional airflow), Lian Li Lancool 216 (great value), NZXT H7 Flow (clean aesthetics with performance), and Corsair 4000D Airflow (mid-range favorite). For compact builds, consider the Cooler Master NR200P or Lian Li A4-H20.
Cable management features like rubber grommets, PSU shrouds, and rear cable channels make assembly easier and improve final appearance. Tempered glass panels showcase your build but show every cable and dust particle.
Cooling System: Keeping Temperatures Under Control
Gaming generates serious heat. Without adequate cooling, your CPU and GPU will thermal throttle, reducing performance to prevent damage. Proper cooling maintains performance, reduces noise, and extends component lifespan.
All CPUs need dedicated cooling: most don’t include stock coolers or the included ones are inadequate for gaming loads. GPUs come with integrated coolers that work fine, aftermarket GPU cooling is for extreme overclockers.
Air Cooling vs Liquid Cooling Solutions
Air coolers use heatsinks and fans to dissipate heat. They’re reliable, maintenance-free, and cost-effective. Budget tower coolers ($25-$40) like the Thermalright Peerless Assassin or DeepCool AK400 handle mid-range CPUs admirably. Premium air coolers ($80-$110) like the Noctua NH-D15 or be quiet. Dark Rock Pro 5 match 240mm AIOs in performance while running quieter.
Advantages: no pump failure risk, zero maintenance, better long-term reliability, quieter at idle. Disadvantages: large coolers can block RAM slots or interfere with case panels, less effective for extreme overclocking.
Liquid cooling (AIO) uses a pump, radiator, and coolant loop to transfer heat. Entry AIOs ($80-$110) with 240mm radiators cool mid-range CPUs effectively with better RAM clearance than tower coolers. High-end AIOs ($140-$220) with 280-360mm radiators handle flagship CPUs and overclocking while looking premium.
Advantages: better aesthetics, no RAM clearance issues, superior cooling for high-end CPUs, RGB options. Disadvantages: pump noise, eventual pump failure (5-7 years), slightly higher cost, more installation complexity.
For most builds, a quality air cooler provides excellent value. Only go AIO if you’re running a power-hungry flagship CPU (Core i9-14900K, Ryzen 9 8950X), want the aesthetic, or have RAM clearance constraints.
Matching cooler to CPU TDP (Thermal Design Power) matters. A 65W CPU works with basic cooling. A 125W CPU needs a tower cooler or 240mm AIO minimum. A 250W flagship CPU demands high-end air cooling or 280mm+ AIOs. Don’t pair a $400 CPU with a $20 cooler, it’ll throttle under load and waste the CPU’s potential.
Additional Components and Accessories You’ll Need
Beyond the core components, you’ll need a few additional items to get your system running and make the build process smooth.
Thermal paste creates heat transfer between CPU and cooler. Most coolers include pre-applied paste or a tube, check before buying extra. If needed, quality paste costs $8-$12 (Arctic MX-6, Noctua NT-H2).
Case fans improve airflow if your case doesn’t include enough. Plan for at least two intake fans (front/bottom) and one exhaust (rear/top). Budget fans ($8-$12 each) work fine: premium options ($20-$30) run quieter with better aesthetics.
Monitor, keyboard, and mouse are external but essential. Don’t blow your entire budget on internals then game on a 60Hz 1080p panel. Allocate $200-$500 for a quality monitor matching your GPU tier. Competitive players prioritize high refresh rates (144-280Hz): single-player gamers might prefer higher resolution or better color accuracy.
WiFi/Bluetooth adapter if your motherboard doesn’t include wireless. PCIe WiFi cards ($35-$55) offer better performance than USB adapters. Many mid-range motherboards now include WiFi 6E built-in.
Operating System and Essential Software
Windows 11 Home ($139 retail) is the standard gaming OS with the best compatibility and DirectX 12 Ultimate support. You can install Windows using the free Media Creation Tool and buy a license later, the system runs with minor restrictions until activated.
OEM keys from key resellers cost $20-$40 but exist in a legal gray area. They work but may deactivate if Microsoft detects resale violations. If budget is tight, install Windows unlicensed and activate later, you’ll have a watermark but full functionality.
Essential software includes GPU drivers (NVIDIA GeForce Experience or AMD Adrenalin), motherboard chipset drivers, and DirectX runtime. Install these before gaming. Optional tools like MSI Afterburner (GPU monitoring/overclocking), HWInfo64 (system monitoring), and Discord enhance the experience.
Tools Required for PC Assembly
You don’t need much. A Phillips #2 screwdriver handles 95% of screws. A magnetic tray prevents losing small screws. Cable ties or velcro straps organize cables. Flashlight or headlamp helps see dark case interiors.
Optional but helpful: anti-static wrist strap ($8) prevents ESD damage to components, though building on a hard surface while occasionally touching your case works too. Tweezers grab dropped screws from tight spaces. Scissors or wire cutters trim cable ties.
Don’t use power tools. Hand-tighten screws until snug but not over-torqued, motherboard standoffs and M.2 screws strip easily.
Budget Planning: Component Priorities at Different Price Points
Allocating your budget correctly determines whether you get balanced performance or bottlenecks. At any price point, the GPU should receive the largest chunk of gaming-focused builds, followed by CPU, then supporting components.
Entry-Level Gaming Build ($600-$900)
This tier targets 1080p gaming at high settings, 60+ FPS in most titles, with room for competitive esports at higher refresh rates.
Component allocation:
- GPU: $250-$320 (RTX 5060, RX 8600 XT)
- CPU: $140-$180 (Ryzen 5 8600, Core i5-14400F)
- Motherboard: $100-$130 (B850, B760)
- RAM: $55-$75 (2×8GB DDR5-5600 or 2×16GB DDR4-3200)
- Storage: $40-$65 (500GB-1TB PCIe 3.0 NVMe)
- PSU: $55-$75 (550-650W 80+ Bronze/Gold)
- Case: $50-$75 (basic airflow case)
- Cooling: $25-$35 (budget tower cooler)
Cost-saving tips: Use the CPU’s stock cooler if included. Consider B-stock or previous-gen GPUs (RTX 4060, RX 7600 XT). Buy 2×8GB RAM now, upgrade to 2×16GB later if needed. Skip RGB and premium aesthetics.
This budget struggles with 1440p gaming at high settings but handles esports titles beautifully. Analysis from PC hardware reviewers shows entry-level builds delivering 100+ FPS in Valorant, CS2, and Fortnite at competitive settings.
Mid-Range Gaming Build ($1000-$1500)
The sweet spot for most gamers, handles 1440p high-ultra settings, 4K with upscaling, and provides excellent longevity.
Component allocation:
- GPU: $450-$650 (RTX 5070, RTX 5070 Ti, RX 8800 XT)
- CPU: $220-$320 (Ryzen 7 8700X, Core i5-14600K)
- Motherboard: $140-$200 (B850/X870, Z790)
- RAM: $100-$130 (2×16GB DDR5-6000)
- Storage: $120-$180 (1-2TB PCIe 4.0 NVMe)
- PSU: $90-$130 (750W 80+ Gold modular)
- Case: $80-$120 (quality airflow case with tempered glass)
- Cooling: $80-$110 (premium air cooler or 240mm AIO)
This tier allows for balanced quality across all components. Spring for 32GB RAM, a fully modular PSU, and a case you actually like. You’ll appreciate the quality-of-life improvements.
Expect 80-120 FPS at 1440p ultra settings in demanding titles, 60+ FPS at 4K with DLSS/FSR, and 200+ FPS in competitive games. This build stays relevant for 4-5 years with maybe a GPU upgrade midway.
High-End Gaming Build ($1500+)
This bracket targets 4K gaming, maximum settings with ray tracing, high refresh rate 1440p, and future-proofing. Diminishing returns kick in hard above $2000.
Component allocation:
- GPU: $900-$1600 (RTX 5080, RTX 5090)
- CPU: $380-$550 (Ryzen 9 8900X, Core i7-14700K, Core i9-14900K)
- Motherboard: $220-$350 (X870, Z790)
- RAM: $130-$200 (2×16GB DDR5-6400+, or 2×32GB)
- Storage: $180-$300 (2TB PCIe 4.0 NVMe + additional drives)
- PSU: $160-$250 (1000-1200W 80+ Gold/Platinum modular)
- Case: $120-$250 (premium case with excellent airflow)
- Cooling: $140-$220 (280-360mm AIO or high-end air)
At this tier, you can afford quality peripherals too. Budget $400-$800 for a 1440p 240Hz or 4K 144Hz monitor to actually use the GPU.
This build crushes 4K gaming at 60-100+ FPS with ray tracing enabled, handles VR flawlessly, and streams without performance hit. It’s overkill for 1080p unless you’re chasing 360Hz competitive gaming.
Conclusion
Building a gaming PC in 2026 requires nine essential components: CPU, GPU, motherboard, RAM, storage, PSU, case, cooling, and Windows. Beyond those, you’ll need basic tools, peripherals, and an hour or two for assembly.
The GPU should dominate your budget allocation for gaming builds, it has the most direct impact on frame rates. Pair it with a CPU that won’t bottleneck, sufficient RAM (16-32GB), fast NVMe storage, and a quality PSU that won’t fail. Everything else supports these core pieces.
Don’t chase bleeding-edge specs beyond your monitor’s capabilities. Match your GPU tier to your display resolution. Invest in quality where it matters (PSU, cooling, storage speed) and save on RGB and aesthetics if budget is tight.
Most importantly, check compatibility before ordering. PCPartPicker catches most incompatibilities, but always verify CPU socket, RAM type, GPU clearance, and PSU wattage. A well-planned build goes together smoothly: a rushed one means return shipping and frustration.
Once you’ve selected your components, the actual assembly is straightforward, install the CPU and RAM on the motherboard, mount it in the case, connect power cables, install the GPU and storage, and boot. Dozens of build guides walk through the process step-by-step. You’ve got this.